WordPress is one of the most popular platforms for creating websites. It is used for blogs, business websites, portfolios, online stores, and many other projects.
Installing WordPress may sound technical at first. However, the process becomes much easier when you understand each step.
You can install WordPress using a hosting provider’s one-click installer. You can also perform a manual WordPress download and installation using FTP and a MySQL database.
This guide explains how to download and install WordPress manually from start to finish. It is designed for beginners, digital marketing students, bloggers, freelancers, and website owners.
What Do You Need Before Installing WordPress?
Before starting your WordPress installation, you need a few basic things. These requirements allow WordPress to store your website files and information correctly.
The three main requirements are a domain name, web hosting, and a database.
Domain Name
A domain name is the address people use to visit your website.
For example:
- example.com
- mybusiness.com
- myblog.in
Your domain should be easy to remember and related to your website or business.
For a business website, choose a professional domain that matches your brand name. For a personal blog, you can use your name or a relevant keyword.
You need to connect your domain to your hosting account before installing WordPress.
Web Hosting Package
Web hosting is where your website files are stored.
When someone visits your website, the hosting server sends the required files to their browser. Therefore, reliable hosting is important for website performance and availability.
Before installing WordPress, make sure your hosting package supports WordPress.
Your hosting should generally provide:
- PHP
- MySQL or MariaDB
- HTTPS support
- FTP access
- Sufficient storage
- A suitable PHP version
Many hosting providers also offer cPanel or another hosting control panel.
MySQL Database
WordPress needs a database to store your website information.
The database stores things such as:
- Posts
- Pages
- User accounts
- Website settings
- Comments
- Plugin information
WordPress commonly uses MySQL or MariaDB databases.
During manual installation, you will create a database and provide its details to WordPress.
WordPress.org vs WordPress.com
Before downloading WordPress, you should understand the difference between WordPress.org and WordPress.com.
Although they use the WordPress name, they provide different experiences.
WordPress.org
WordPress.org provides the WordPress software for download.
It is open-source and can be installed on your own hosting account. This is commonly called self-hosted WordPress.
With WordPress.org, you have greater control over:
- Themes
- Plugins
- Website files
- Hosting
- Customization
- Website functionality
You can download the WordPress software for free and install it on compatible hosting.
Manual WordPress installation usually refers to installing this self-hosted version.
WordPress.com
WordPress.com is a managed website platform.
You do not normally need to download WordPress files or manually create a database. Instead, the platform handles much of the technical setup for you.
This makes WordPress.com easier for many beginners.
However, the level of customization and control depends on the plan and features you choose.
In simple terms:
WordPress.org → Download and manage WordPress yourself
WordPress.com → WordPress hosting platform with managed setup
How to Download WordPress
The first step in a manual installation is downloading WordPress.
Download From WordPress.org
Always download WordPress from the official WordPress.org website.
Download WordPress from the official website
Look for the latest available WordPress release and download the installation package.
Avoid downloading WordPress from unknown websites. Unofficial packages may contain modified or unsafe files.
Using the official source gives you a cleaner and safer starting point.
WordPress Download Format
WordPress is commonly provided as a ZIP file.
After downloading it, you need to extract the files on your computer.
Inside the extracted folder, you will find important WordPress files and folders, including:
- wp-admin
- wp-content
- wp-includes
- wp-config-sample.php
- index.php
These files make up the WordPress software.
You will later upload them to your hosting server.
Check the Latest WordPress Version
Always check the official WordPress website before beginning your installation.
Using a current supported version helps you access the latest features, fixes, and security improvements.
Do not use an old WordPress package simply because you found it on your computer.
How to Manually Install WordPress
Now let’s move to the main part of this WordPress installation guide.
The manual process involves uploading WordPress files, creating a database, connecting the database, and completing the setup.
Follow each step carefully.
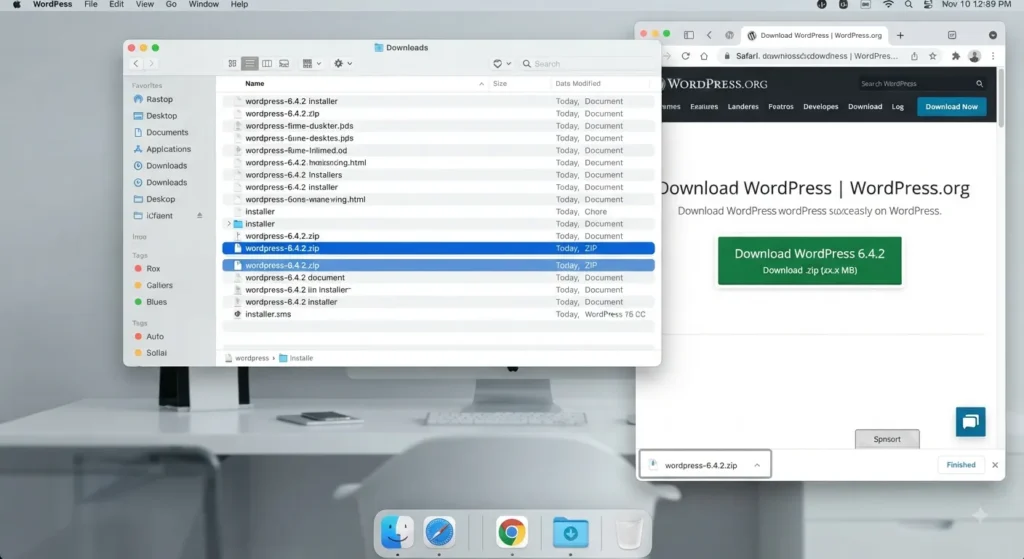
Step 1: Download WordPress
First, download the latest WordPress package from the official WordPress website.
Save the ZIP file to your computer.
Once the download finishes, locate the file in your Downloads folder.
You are now ready to extract the WordPress files.
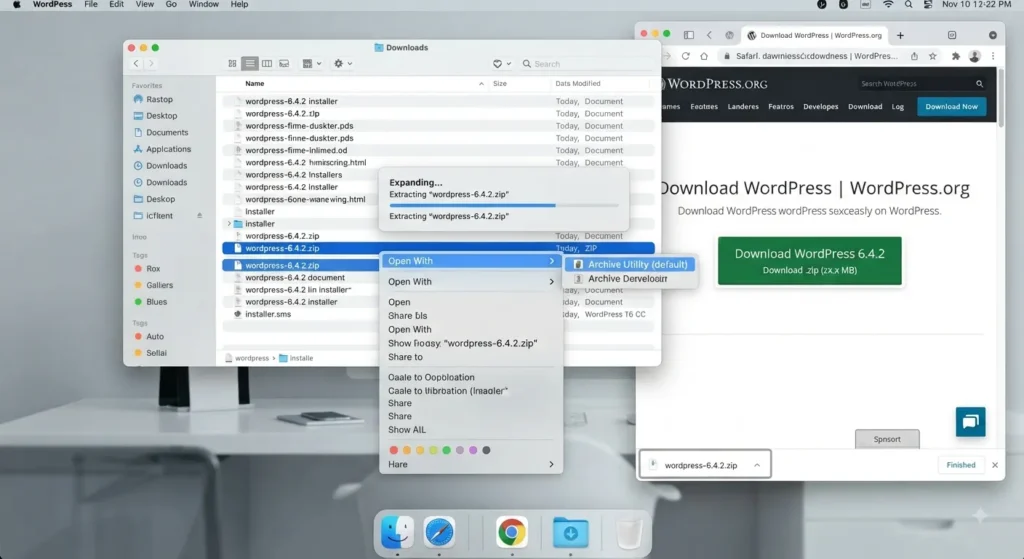
Step 2: Extract the WordPress Files
Right-click the downloaded ZIP file.
Choose the option to extract or unzip the files.
You should now see a WordPress folder containing the installation files.
Open the folder and check that the main WordPress files are present.
Do not delete or modify these files unless you understand their purpose.
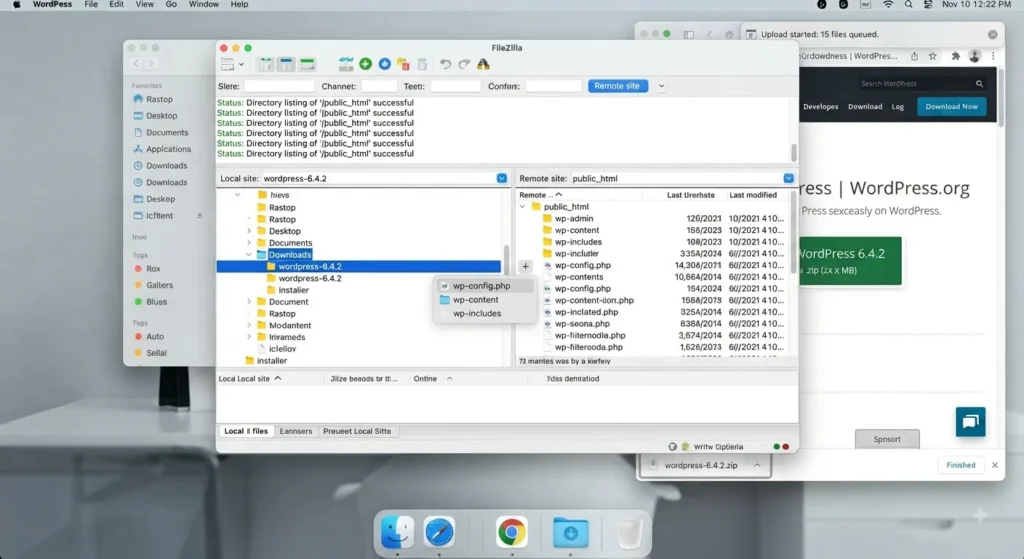
Step 3: Upload WordPress Files
The next step is uploading WordPress to your hosting server.
You can use an FTP client such as FileZilla.
You will usually need:
- FTP host
- FTP username
- FTP password
- FTP port
Your hosting provider normally provides these credentials.
After connecting FileZilla to your server, locate the website’s root directory.
On many hosting accounts, this directory is called:
public_html
Upload the WordPress files into the appropriate website directory.
If you want WordPress to appear directly at:
example.com
the WordPress files generally need to be inside the site’s root directory.
If you want WordPress installed in a subfolder, the files can be placed inside a directory such as:
example.com/blog
The upload may take a few minutes depending on your internet connection.
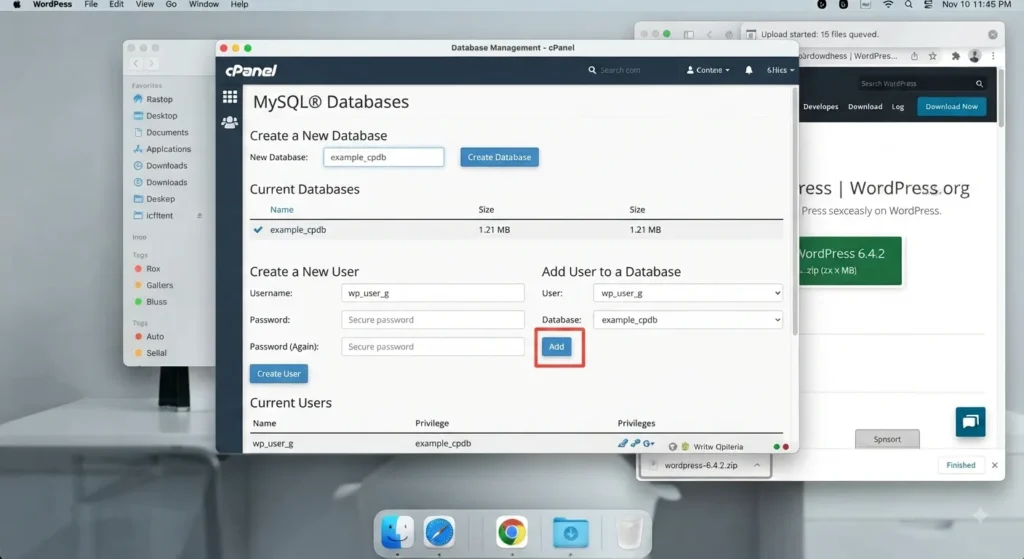
Step 4: Create a MySQL Database
Now you need to create a database for WordPress.
Log in to your hosting control panel.
Look for the database management section. Depending on your hosting provider, you may see options such as MySQL Databases or a similar database tool.
Create a new database.
Then create a database user and assign that user to the database.
You will need to remember these details:
- Database name
- Database username
- Database password
- Database host
In many hosting environments, the database host is:
localhost
However, this can vary by hosting provider.
Make sure the database user has the required privileges for the WordPress database.
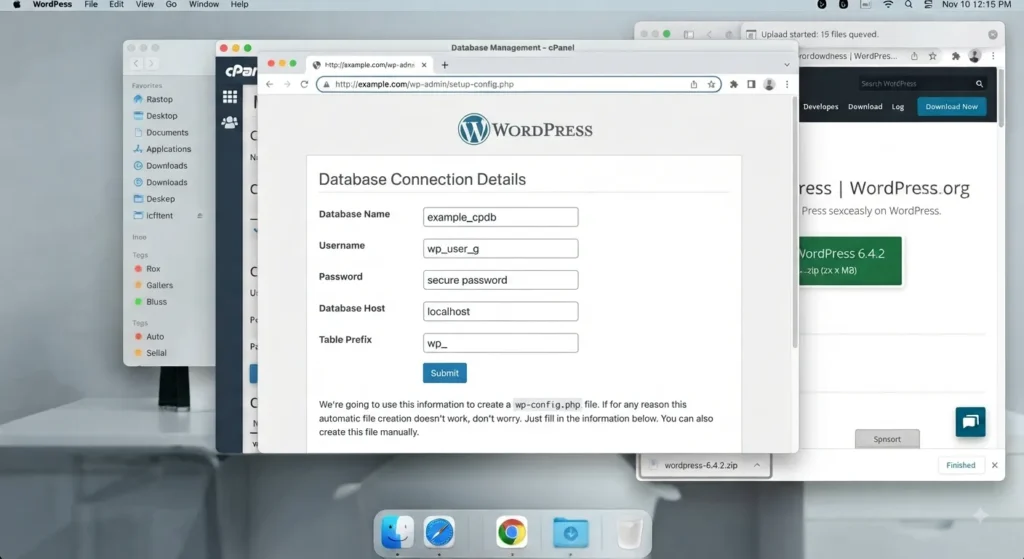
Step 5: Connect WordPress to the Database
Now WordPress needs to know where its database is located.
Open your website domain in a browser.
If the WordPress files were uploaded correctly, WordPress should display its installation screen.
You may be asked for database information such as:
Database Name: Your WordPress database
Username: Your database username
Password: Your database password
Database Host: Usually localhost
Table Prefix: Usually wp_
Enter the correct information carefully.
WordPress will use these details to communicate with the database.
If the details are correct, WordPress should be able to establish the database connection.
Step 6: Run the WordPress Setup Wizard
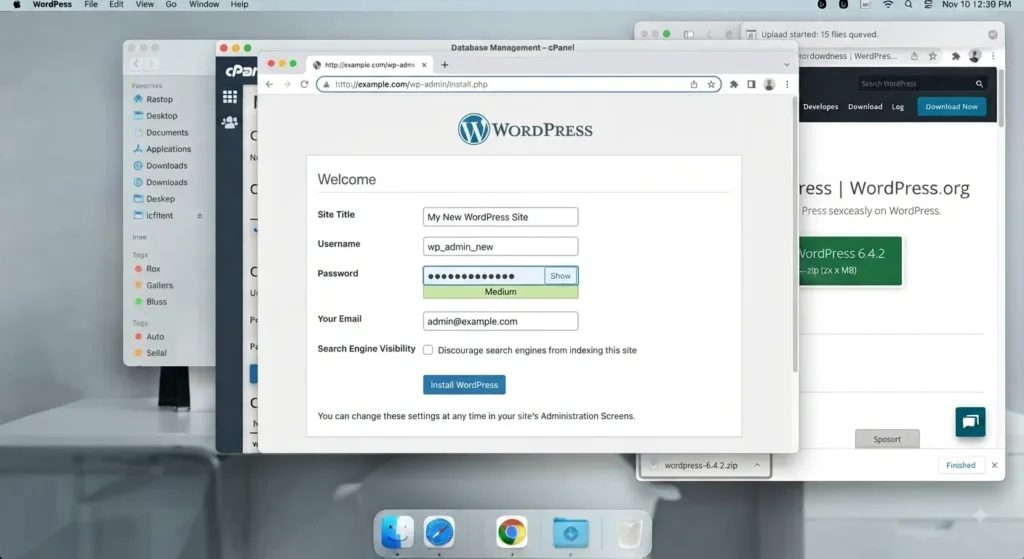
After connecting the database, WordPress will ask you for basic website information.
You will normally provide:
- Site title
- Admin username
- Admin password
- Admin email address
Choose a strong administrator password.
Avoid using simple passwords such as your name, birth year, or 123456.
You should also avoid using admin as your administrator username when possible.
Your admin email is important because WordPress can use it for notifications and account-related communication.
Complete the installation to create your WordPress website.
Step 7: Log In to the WordPress Dashboard
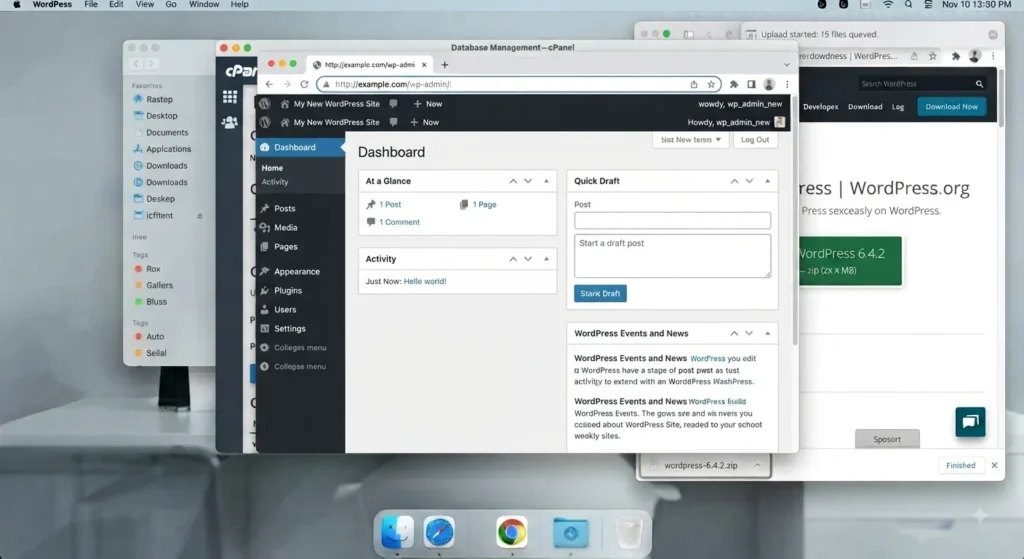
Once the installation finishes, you can log in to your WordPress dashboard.
The standard login address is:https://yourdomain.com/wp-admin
Replace yourdomain.com with your actual domain.
Enter your administrator username and password.
You will then enter the WordPress dashboard.
From the dashboard, you can manage:
- Posts
- Pages
- Themes
- Plugins
- Media
- Users
- Settings
This dashboard becomes the main control center for your website.
What Should You Do After Installing WordPress?
Your WordPress installation is complete, but there are still some important tasks.
First, check whether your website loads correctly.
Then enable HTTPS if your hosting provider has not already configured it.
You should also update WordPress, themes, and plugins.
Next, choose a suitable WordPress theme and install only the plugins you actually need.
Finally, configure backups and basic security settings.
These steps can help create a safer and more reliable website.
WordPress Installation Checklist
Use this checklist after completing your installation:
- Domain connected
- Hosting activated
- WordPress downloaded
- WordPress files extracted
- WordPress files uploaded
- MySQL database created
- Database user created
- Database connected
- Installation completed
- Admin account created
- Website title configured
- SSL enabled
- WordPress updated
- Backup configured
- Security settings reviewed
Common WordPress Installation Problems
Manual installation can sometimes produce errors.
Here are a few common problems beginners may encounter.
Database Connection Error
This usually happens when the database name, username, password, or host is incorrect.
Check each database detail carefully.
Also confirm that the database user has access to the database.
WordPress Files Are in the Wrong Folder
If your website does not load correctly, check where you uploaded the WordPress files.
For a main domain, the files are often placed inside:
public_html
However, your hosting structure may be different.
FTP Upload Failed
An FTP upload can fail because of incorrect credentials, connection problems, or insufficient permissions.
Check your FTP details and reconnect to the server.
Website Shows a Security Warning
If your website uses http:// instead of https://, SSL may not be configured correctly.
Contact your hosting provider or configure an SSL certificate through your hosting control panel.
Conclusion
Manual WordPress installation may seem complicated at first. However, the process becomes straightforward when you follow each step carefully.
First, you need a domain, hosting, and database. Then, download WordPress from the official source and extract the files.
Next, upload the files using FTP. Create a MySQL database and connect it with WordPress. Finally, complete the setup wizard and log in to your WordPress dashboard.
For beginners, one-click installation is the easiest option.
For greater control and technical learning, manual FTP installation is a useful option.
For testing and development, local WordPress installation is a great choice.
