You’ve seen fashion photos where the light does exactly what it should. Skin looks smooth without looking flat. Shadows fall in the right places. The background pops without pulling focus from the model. And you’ve probably wondered how that look was built, light by light.
This guide breaks down the fashion lighting setups photographers actually use, the modifiers behind them, and the small techniques that make the difference between a flat shot and a polished one.
Fashion Lighting Setups by Style
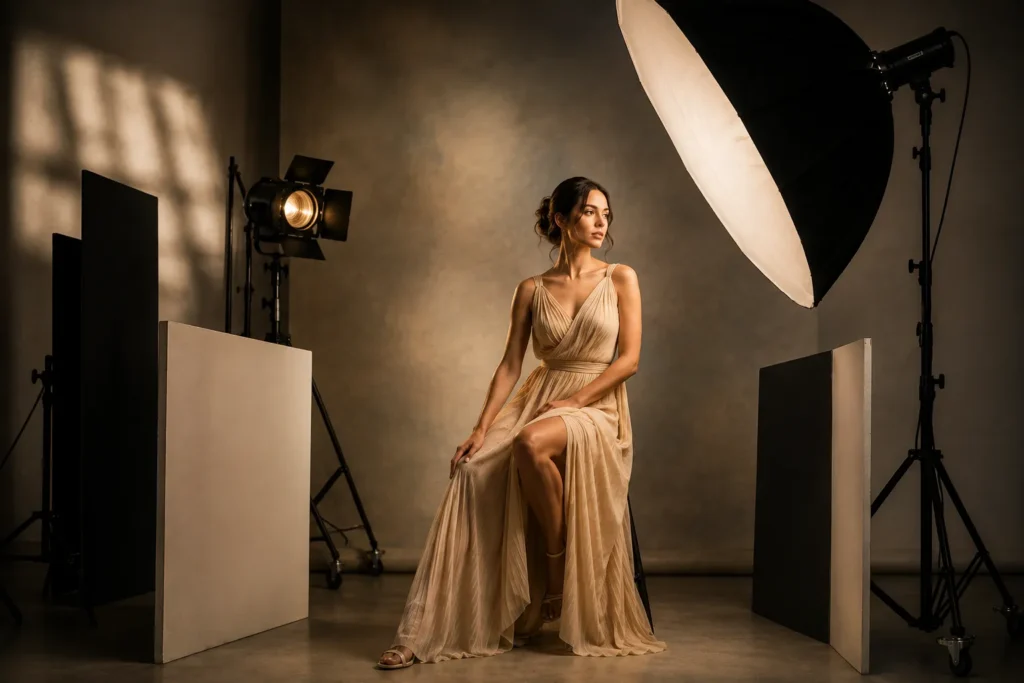
Soft Painterly Light Setup
This setup is built for a soft, classic look the kind you’d associate with portrait paintings rather than snapshots.
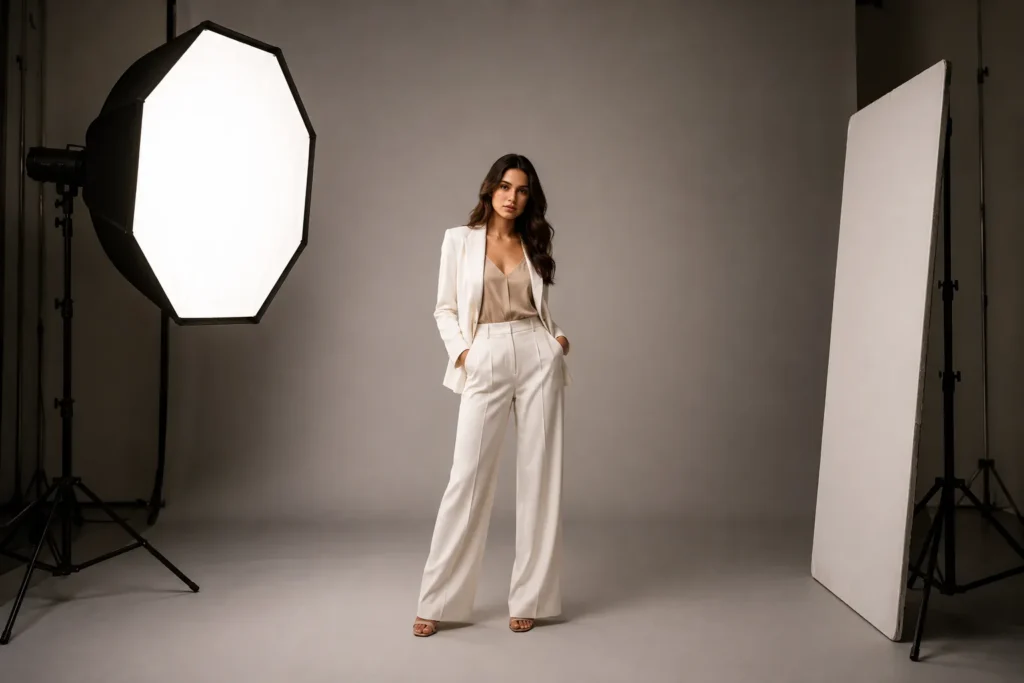
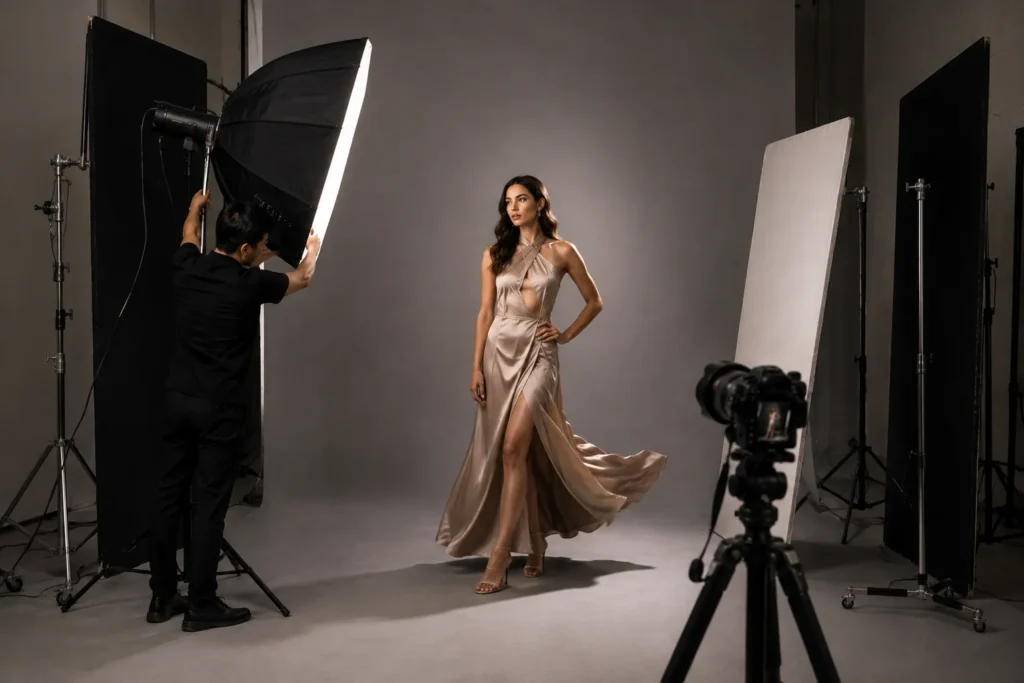
Key light: A large indirect octabox, around 190 cm, placed to bounce light gently onto the subject instead of hitting them directly. The bigger the light source relative to the subject, the softer the shadows.
Secondary light: A vintage-style fresnel light adds a warm, slightly old-world quality to the image. It’s used to add character rather than raw brightness.
Shadow control: V-flats and flags are placed around the set to block or bounce light selectively. This keeps shadows soft instead of letting them turn muddy or uneven.
Camera settings: A narrow aperture like f/8 keeps the subject sharp, ISO 100 keeps noise low, and a black Pro-Mist filter softens highlights slightly for that painterly finish.
Bold Editorial Hard Light Setup
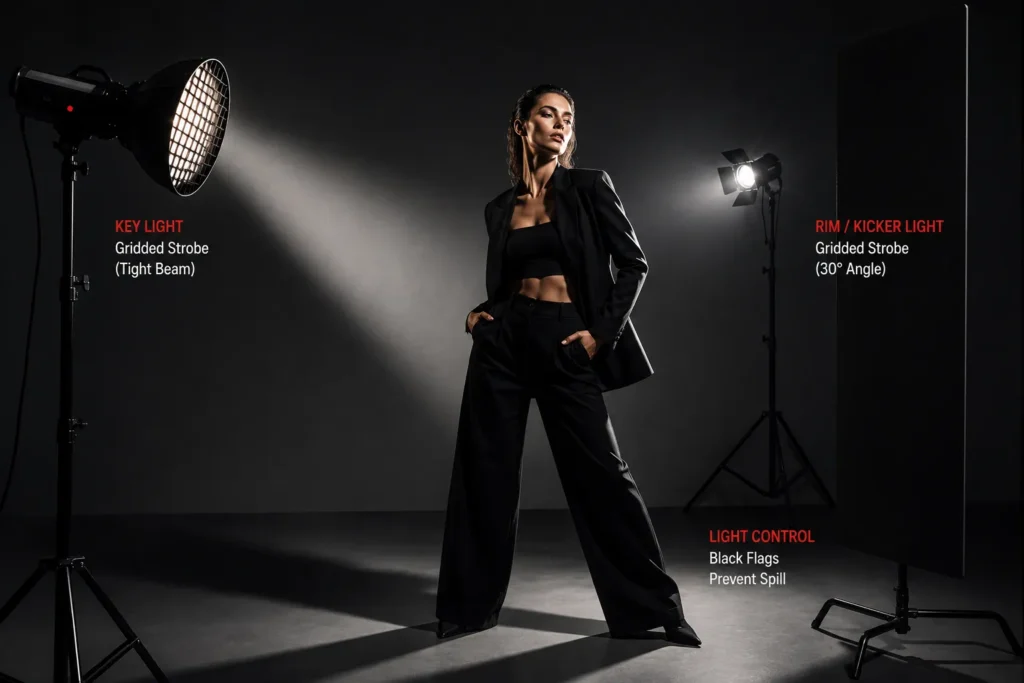
When the goal is impact rather than softness, hard light does the job. This setup is common in high-contrast editorial and campaign work.
Main light: Strobes fitted with grid reflectors focus the light into a tight beam, creating strong highlights and deep shadows. Grids stop light from spilling onto the background or other parts of the frame.
Rim light: A gridded kicker light placed at roughly a 30-degree angle behind or beside the subject adds a bright edge that separates them from the background. This is what gives editorial shots that graphic, three-dimensional look.
Freezing motion: For shots involving movement hair flips, fabric swings, jumps a fast flash duration (around 1/13,000s or faster) freezes the action sharply.
Styling choice: Adding a cool or blue tint to shadow areas in post-production reinforces the hard, modern feel of the image.
Creative Gel Lighting Setup
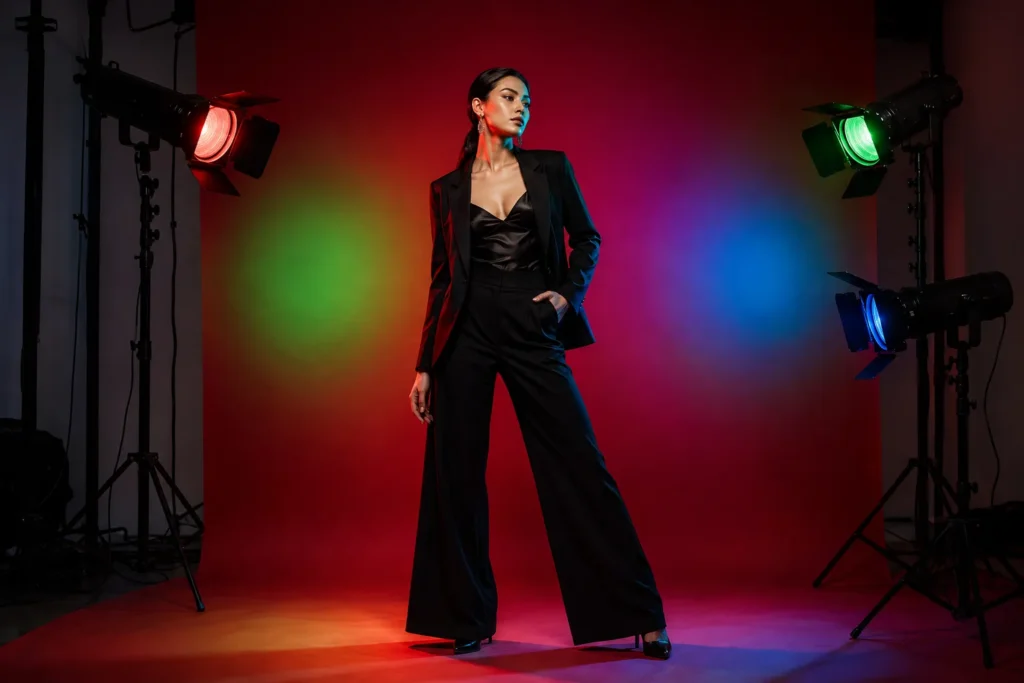
Gel lighting is used when the shot needs a bold, graphic color story rather than natural-looking light.
Color blending: Red, green, and blue gels are placed on separate lights and blended so their edges overlap, creating gradient color effects instead of flat washes.
Background: A bold seamless backdrop, like crimson, gives the gels something rich to interact with and makes the color transitions more visible.
Metering: Each gelled light needs to be metered individually so no single color overpowers the others. Skipping this step is the most common reason gel shots look unbalanced.
Wardrobe: High-contrast clothing colors help the subject stand out against the colorful, sometimes busy background.
Standard Studio Lighting Setups
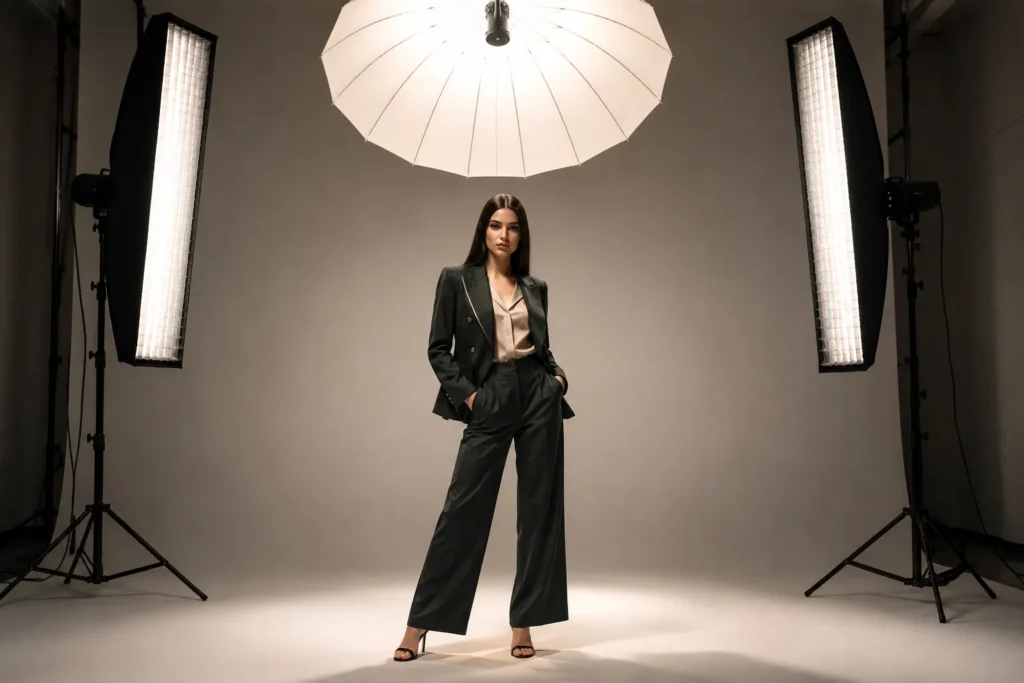
Beyond stylized looks, most fashion shoots rely on a smaller set of dependable, repeatable setups. These are the setups worth learning first.
Multi-Light Combinations
Umbrella and dual stripboxes: A central umbrella for overall light, with two stripboxes on either side to shape the body and add definition.
Octabox and background gradient: A single soft key light on the subject paired with a separate light aimed at the background to create a gradient effect behind them.
Full-length stripbox: Useful for tall subjects or full-body shots, since a tall, narrow light source keeps light even from head to toe.
Single Source Setups
Octabox with reflecting panels: One main light source bounced and filled using reflective panels instead of a second light a simpler, more budget-friendly setup.
Silver umbrella wrap-around: A silver umbrella creates a slightly harder, more reflective light than a white umbrella, wrapping around the subject for even coverage.
Background Control
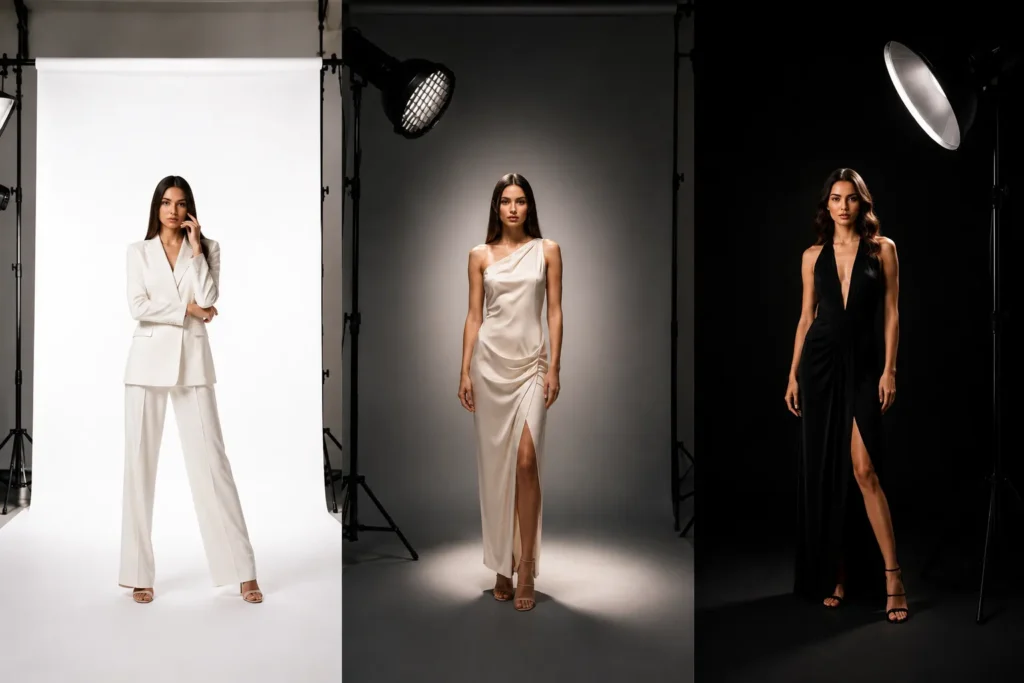
Pure white: Lighting the background at full brightness to blow it out completely, common for e-commerce and clean catalog shots.
Gradient spots with grids: Grid-fitted lights aimed at specific parts of the background to create a soft light-to-dark gradient.
Total black with a beauty dish: Keeping the background completely dark while a beauty dish lights only the subject, for a moody, focused look.
Hair and Fill Lighting
High stripbox for hair outline: Positioned above and behind the subject to create a thin rim of light along the hair, separating it from the background.
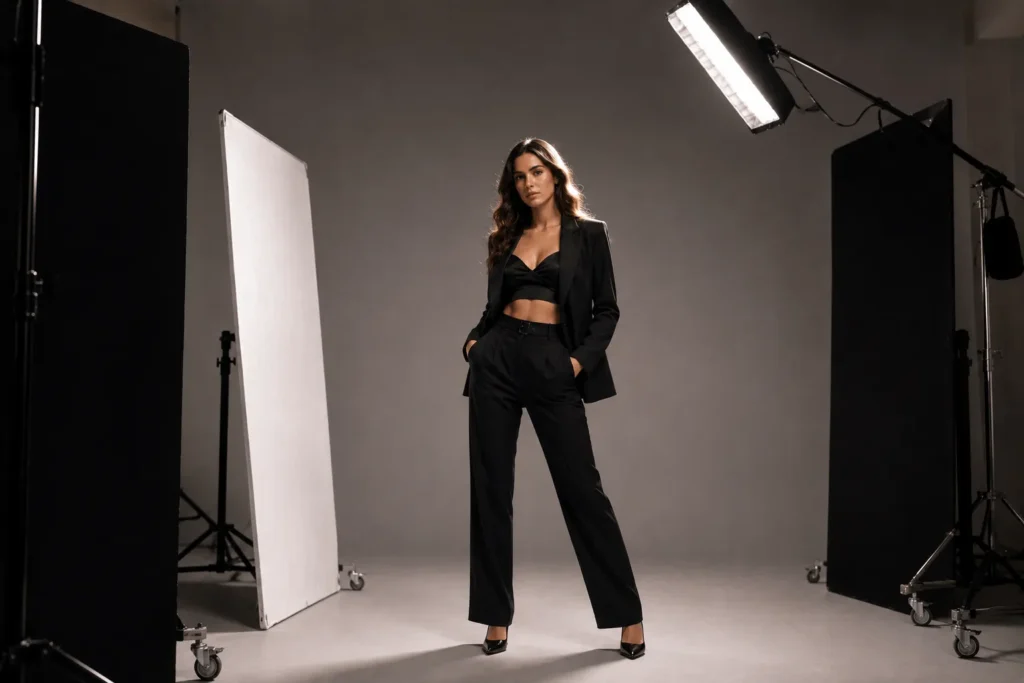
White panels for fill: Bounce light back into shadow areas without adding a new light source.
Black flags for light absorption: Placed to absorb stray light and keep shadows clean where needed.
Essential Lighting Modifiers and Gear
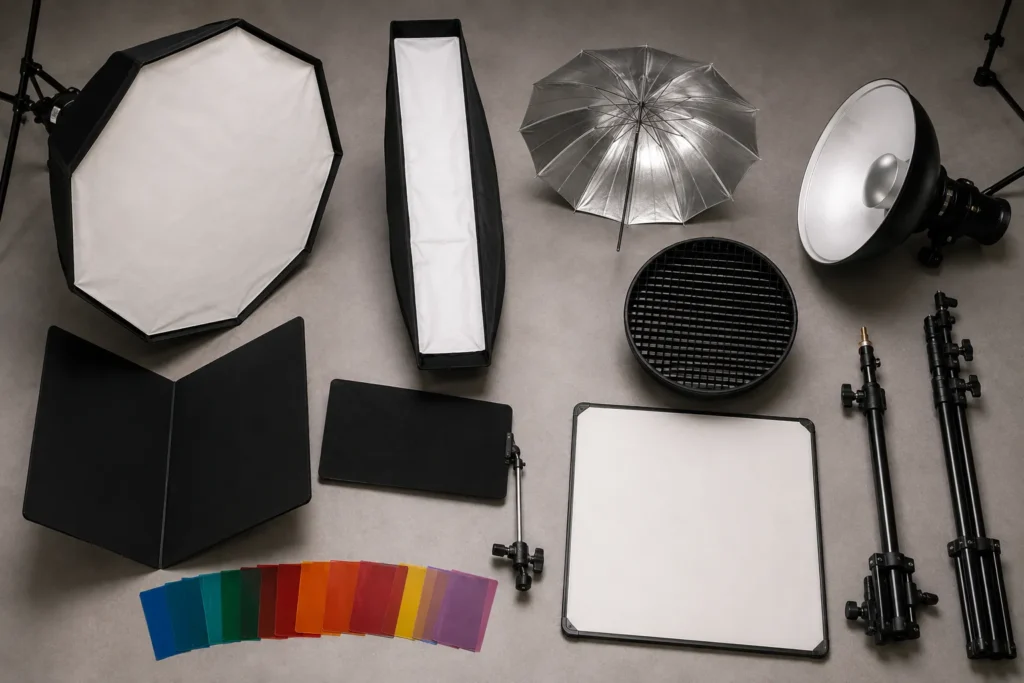
Every setup above depends on a small set of modifiers. Knowing what each one does makes it easier to adapt these setups to your own gear.
Soft modifiers
Octaboxes (90–190 cm): Larger sizes give softer light; smaller sizes are more portable but harder-edged.
Silver umbrellas: Slightly more contrast than white umbrellas, with a punchier catchlight.
Stripboxes: Narrow and tall, ideal for shaping the body or lighting hair.
Hard modifiers
Beauty dish: A middle ground between soft and hard light, popular for close-up beauty and fashion shots.
Standard reflector: A basic, unmodified light source, harder and more directional.
Metal grids: Attach to reflectors or beauty dishes to narrow the light’s spread.
Light control tools
V-flats: Large flat panels used to bounce or block light.
French flags: Small flags used to block light from hitting the lens or specific parts of the frame.
Reflective panels: Bounce light back onto the subject without needing an extra flash.
Color gels: Colored sheets placed over lights to change their hue.
Pro Tips for Better Fashion Lighting
A few habits separate a functional setup from a polished one:
Feather your key light. Instead of aiming it directly at the subject, angle it slightly so only the edge of the light hits them. This softens the transition between light and shadow.
Prioritize flash duration for movement. If your shoot involves any motion, check your flash duration before worrying about power output. A fast duration matters more than raw brightness for freezing action.
Use radial masks in editing. Instead of trying to get everything perfect in-camera, radial masks in post-production let you brighten or darken specific areas without relighting the whole shot.
Change wardrobe between setups. Switching outfits as you move between lighting setups keeps a single session visually varied, which matters if the images are meant for a portfolio or campaign with multiple looks.
Bringing It Together
Fashion lighting setups aren’t random they’re built from a handful of decisions: how soft or hard the light should be, which modifiers create that quality, and which control tools keep everything clean. Once you understand these building blocks, you can mix and match them instead of copying a single formula.
Start with one setup from this guide, get comfortable with it, and build from there. The gear matters less than understanding why each light is placed where it is.
If you’d rather have a team handle the lighting, styling, and shoot planning for you, Photowant offers professional fashion and product photography services in Kochi, built around setups like these.
