A single photograph decides whether a customer in Kochi, Kozhikode, or Thiruvananthapuram clicks “Add to Cart” or scrolls past your product forever. As Kerala’s online sellers ; from spice exporters in Wayanad to handloom weavers in Kannur and coir manufacturers in Alappuzha ; increasingly move their businesses onto Amazon, Flipkart, Meesho, Instagram, and WhatsApp Business, product photography has become the single most important sales tool they own. This guide walks you through everything you need to shoot, edit, and optimize product photos that convert browsers into buyers.
Why Product Photography Makes or Breaks Your Kerala Ecommerce Business
Great photography does more than make a product look nice , it directly drives revenue. Sharp, well lit images build instant trust and push shoppers to complete their purchase instead of abandoning their cart. When your photos accurately represent your product, customers know exactly what they’re getting, which cuts down on returns and refund requests ,a real cost saver for small businesses shipping from Kerala to buyers across India and abroad.
Professional imagery also elevates your brand’s credibility. A Munnar tea brand or a Kasaragod handicraft seller that invests in clean, consistent photography looks established and trustworthy next to competitors using blurry phone snapshots. In Kerala’s booming home-based and MSME ecommerce sector, where thousands of sellers compete for the same customer’s attention, strong visuals give you a genuine edge. And because most online shoppers can’t touch or examine your product before buying, your photos become their only way to connect with what you’re selling ; so every image needs to work hard.
Choosing the Right Type of Product Photography
Different products and platforms call for different photography styles. Match your approach to what you’re selling and where you’re selling it.
- White background photography (packshots) remains the ecommerce standard. If you sell on Amazon India or Flipkart, you’ll need clean, isolated product shots on a pure white background , these platforms often require it for the main listing image.
- Lifestyle and on-model photography shows your product in real use. A Kerala saree or mundu seller benefits enormously from shooting garments on models rather than flat on a table, since customers want to picture themselves wearing the piece.
- Detail and macro shots highlight craftsmanship and texture is essential for showcasing the intricate zari work on a Kasavu saree, the grain of a rosewood carving, or the weave of a coir doormat.
- Scale shots help customers judge size accurately, which matters when you’re shipping products they can’t physically hold – think brass lamps, furniture, or packaged spice boxes.
- 360-degree interactive spins let shoppers rotate a product on screen, boosting engagement for higher value items like jewelers or handicrafts.
- Group and collection shots display your full range together, encouraging customers to add more than one item to their cart perfect for showing an entire spice gift box lineup or a set of Ayurvedic skincare products.
Building Your Product Photography Equipment Kit
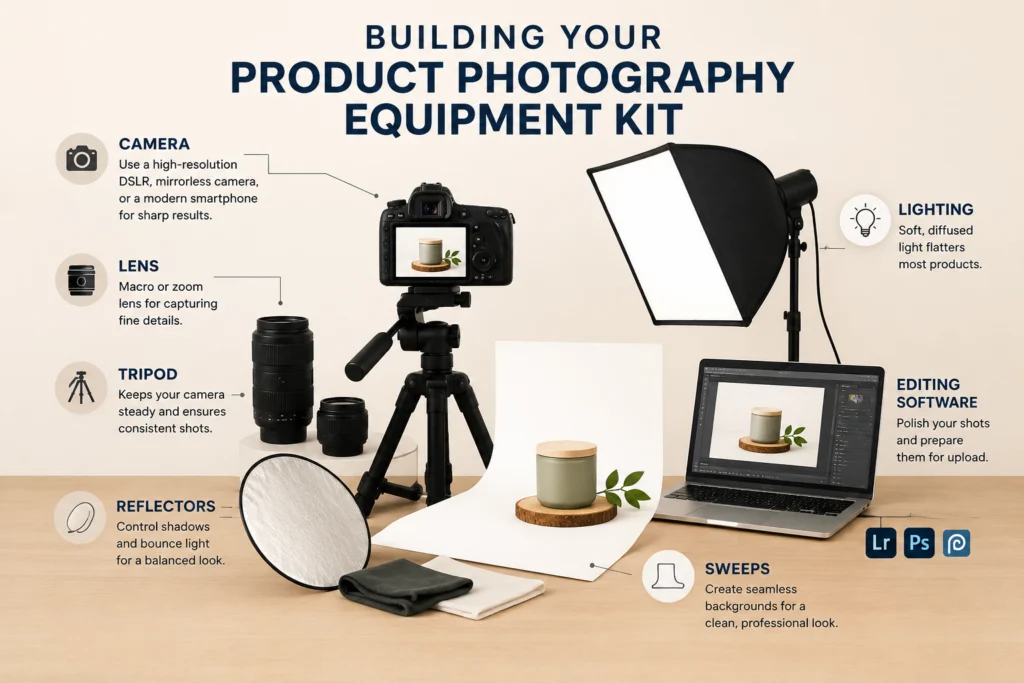
You don’t need a Bollywood style studio to shoot professional product photos, but a few essential tools make a massive difference.
Start with a high resolution camera. A DSLR or mirrorless camera gives you the sharpest, most flexible results, though a modern smartphone with a good camera can work well for smaller budgets. Add a macro or zoom lens if you’re photographing fine details like embroidery, spices, or jewellery.
Invest in a sturdy tripod to eliminate camera shake and keep every shot in your catalog consistent. Lighting matters more than any other single factor: soft, diffused light (from a soft box or even a well-shaded window) flatters most products, while harder, more directional light works better for creating dramatic shadows on items like carved wood or metal crafts. Learn more about photography lighting types, techniques, and tools to choose the right setup for your products.
Reflectors and sweeps (a curved white backdrop) help you control shadows and create that seamless white background look. Finally, editing software from free tools like Photopea or GIMP to paid options like Adobe Lightroom and Photoshop lets you polish your shots and prepare them for upload.
The Step by Step Product Photography Process
What is the process of product photography? In short: set up a consistent, well lit shooting space, clean and stage your product carefully, capture test shots to fine tune your settings, then apply proven composition techniques before shooting your final images.
Start by setting up your space and lighting. Choose a spot with consistent, controllable light; many Kerala home based sellers convert a corner of a room near a window into a permanent mini studio, which saves setup time on every future shoot.
Next, clean and stage your product. Wipe away dust and fingerprints, iron fabrics, and arrange items exactly as you want them photographed. This step matters enormously for food products, textiles, and handicrafts where small imperfections show up clearly in a photo.
Take test shots before your full shoot. Check your exposure, focus, and framing on a few sample images so you can adjust your camera settings early, rather than discovering problems after editing a hundred photos.
Finally, apply strong composition techniques as you shoot:
- Rule of thirds – position your product off center along an imaginary grid for a more dynamic, professional look.
- Diagonal layouts – arrange multiple items along a diagonal line to create visual movement, useful for spice or tea collections.
- Fibonacci sequence – use this natural spiral pattern to guide the eye smoothly toward your product’s focal point.
- Central placement – center your product directly when simplicity and clarity matter most, as with standard white-background packshots.
Post Production: Editing and Optimizing Your Images
Raw photos rarely go straight to your listing. Post production is where good photos become great ones.
Clean up your background first, isolating the product cleanly from any distracting elements. Correct color and brightness so your photo represents the true shade of your product : this step is critical for textile and spice sellers, since customers get frustrated when a “maroon” saree arrives looking nothing like the photo. Crop and frame your images consistently across your entire catalog so your storefront looks unified rather than mismatched.
Then optimize every image for the web. Save files in the right format . JPEG for most product photos, PNG when you need transparency. Write descriptive image file names and alt text using your target keywords (this also helps your listings rank better in Google and marketplace search). Finally, check each platform’s specific image requirements . Amazon, Flipkart, and Meesho all have their own minimum resolutions and background rules, so confirm before you upload.
Best Practices Every Kerala Seller Should Follow
Maintain visual consistency across your entire product catalog and use the same lighting setup, background, and angles for every shot so your store feels professional and trustworthy. Add relevant props sparingly to give context without distracting from the product itself; a banana leaf beside a spice jar tells a story, but too many props clutter the frame. Always ensure your product photos accurately reflect the real item’s color, size, and condition accuracy protects you from returns and negative reviews. And capture multiple angles for every listing, since customers want to examine a product from the front, back, sides, and close up before they trust it enough to buy.
Common Product Photography Mistakes to Avoid
Poor lighting ruins otherwise good photos, creating harsh shadows or washed out colors that make products look unappealing. Over editing is just as damaging, pushing saturation or brightness too far creates unrealistic images that disappoint customers when their order arrives. Inconsistent image sizing across your listings makes your store look unprofessional and can even get flagged by marketplace algorithms. And distracting backgrounds, a cluttered room, a patterned bedsheet, or uneven lighting pull attention away from the one thing that should matter: your product.
Choosing the Right Production Strategy for Your Business
Should you outsource product photography or handle it in house? The right choice depends on your catalog size, budget, and growth plans; smaller sellers often save money shooting in house, while growing brands benefit from the consistency and speed that professional photographers or CGI rendering provide.
Managing photography in house works well for smaller catalogs and gives you full creative control along with meaningful cost savings, especially useful for home based Kerala businesses just starting out. Outsourcing to specialists becomes the smarter move as your catalog grows. Professional photographers deliver consistent, scalable, high quality results that free up your time to focus on running the business. CGI and 3D rendering offer a modern alternative for sellers with complex or high volume catalogs, letting you generate unlimited product angles and variations without repeated physical photoshoots, a growing option for Kerala furniture and home decor brands shipping across India.
Bringing It All Together
Product photography isn’t a one time task, it’s an ongoing investment that pays off in higher conversion rates, fewer returns, and a stronger brand reputation. Whether you’re a spice exporter in Idukki, a handloom seller in Payyanur , or a home based Instagram entrepreneur in Kochi, the sellers who consistently invest in quality visuals are the ones who win customer trust and repeat business in Kerala’s fast growing digital marketplace.
Start small: set up one consistent shooting space, master the basics of lighting and composition, and build a simple editing workflow. As your business grows, consider bringing in professional photographers or exploring CGI rendering to scale your catalog without sacrificing quality.
